How to make salt soap bars – Easy Melt and Pour Salt Soap Recipe
How to make salt soap bars with natural colorants and essential oils. This DIY sea salt soap cleanses, exfoliates, purifies, and nourishes your skin in a single step. This melt-and-pour pink Himalayan salt soap recipe makes the perfect handmade gift for anyone on your list.

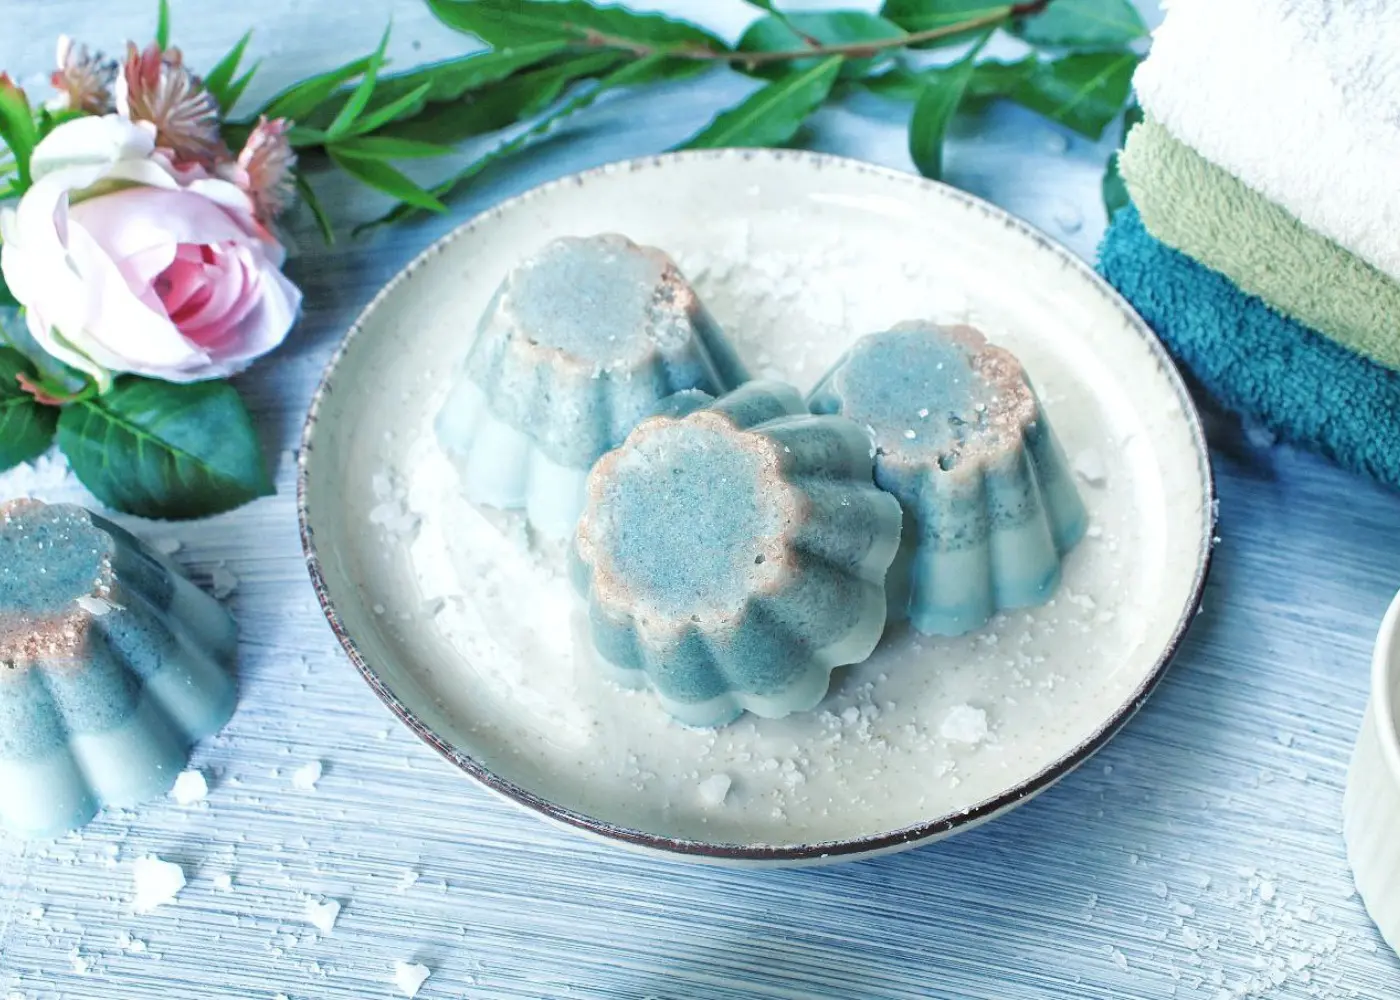
Homemade Salt Soap Bars
Making the peeling bars isn’t difficult and doesn’t take long at all. Best of all, you control what goes into your skincare product: instead of synthetic parabens or silicones, the Himalayan salt soap bars are made with natural, non-toxic ingredients that replenish and nurture dry, dull skin. Read on to learn how to make salt soap bars, what essential oils you can use, and how to turn the bars into cute gifts!
Why salt?
We all know that too much salt isn’t the best for your health. It’s safe to say it is one of the worse things.
But did you know that salt can benefit the skin when used topically? It can be used to exfoliate, detox, and clarify the skin. When used as an exfoliate, the salt soap bars can remove dead skin cells and expose healthy glowing skin. I use sea salt and pink Himalayan salt for this salt soap bar.

Benefits of sea salt soap
It’s full of minerals beneficial to the skin, like magnesium, calcium, sodium, zinc, potassium, and more.
Use sea salt bars like ordinary soap, especially when your skin feels dull or oily. They’re laden with sea salt that adds scrubby action and cleansing properties, particularly helpful for those with acne-prone skin. The recipe below will show you how to make sea salt soap bars using the melt-and-pour method.
In case you don’t know about the benefits of sea salt, here are some:
- tones the skin
- balances oil production
- cleanses pores deeply
- eliminates bacteria that can cause acne and breakouts
- removes toxins from the body
- calms eczema and skin rashes
Benefits of pink Himalayan salt
Pink Himalayan salt is a great skincare ingredient.
Himalayan salt contains trace minerals that your skin can potentially absorb. Salt, in general, can improve the texture and clarity of your skin and overall health.
In soap recipes, pink Himalayan salt is mainly used for its pretty color. This salt type is made up of sodium chloride (table salt), but it features over 80 minerals, such as potassium, magnesium, and iron, which may benefit the skin.

What else do I need to make homemade salt soap bars?
For this recipe, we are going to use a soap base. You can make your own or purchase one. A soap base can be a solid or a liquid. We will be melting a solid soap base that comes in a bar.
You will also need shea butter for this recipe. Shea butter has many skincare benefits. Shea can also help to treat acne and reduce the appearance of acne scars. Shea butter is very moisturizing and contains loads of skin-healing vitamins. It can heal skin imperfections, and it can reduce inflammation.
Colourant (optional) – for a little colour, dye the Himalayan salt soap bars with mica (I used sky blue mica). Without dye, the DIY sea salt soap bars will appear white.
What essential oils are best for the skin?
This is the fun part, friend! Add whatever essential oils you want to customize your salt scrub soap bars. The essential oils will give it added benefits and a beautiful scent. You can add one oil or a blend of oils.
Blue cypress essential oil has a fresh, woodsy, and balsamic scent. The oil also provides excellent support for skin health and healthy respiratory functioning.
Peppermint oil is wonderful for the skin, leaving it soothed, cooled, and fresh. Peppermint essential oil naturally cleans the skin and may help with blemishes and other imperfections.
Tools
Soap mold – I used this beautiful mold to form my sea salt soap bars. A classic rectangular silicone soap mold works well, too.
Food processor – A food processor allows you to mill the salt crystals into fine dust. Milling the salt makes it less abrasive on the skin and better mineral absorption.
Cutting board and paring knife – A knife and cutting board are required to cut the melt and pour the soap base into smaller pieces before melting.
Measuring cup: A large heat-proof measuring cup or pitcher is needed to melt the soap.

How to make salt bars
Ingredients
- 540 g goat milk soap base
- 300 g sea salt
- 120 g Himalayan salt
- 30 g Shea butter
- 15 drops of Blue cypress essential oil
- 10 drops of Peppermint essential oil
- ⅛ tsp mica (optional)
- Put the sea salt into a food processor or blender and pulse a couple of times. Beware the dust cloud when opening the food processor, and avoid breathing in salt dust. This step is optional but recommended because extra fine salt is gentler on the skin.
- Melt your soap base and shea butter in a small microwave saucepan. To make this faster, you can shred or cube the soap bar.
- Mix in your food coloring if using, and stir well.
- Pour the mixture into your molds. Melt and pour salt soap will harden almost immediately, so work quickly.
- Place the mold into the fridge to harden for about 20 to 30 minutes.
- Once the soap bar feels cool, release it from the mold.
You can store these in a glass mason jar, a Ziploc bag, or an airtight container. These will be good for one year, but I doubt they will last that long!
More DIY Beauty Recipes with Salt
Sea Salt Soap
Materials
- 540 g goat milk soap base
- 300 g sea salt
- 120 g Himalayan salt
- 30 g Shea butter
- 15 drops of Blue cypress essential oil
- 10 drops of peppermint essential oil
- ⅛ tsp mica (optional)
Tools
- Cutting board
- food processor
- glass measuring cup or pitcher
- single-cavity silicone soap mold
Instructions
- Put the sea salt into a food processor or blender and pulse a couple of times. Beware the dust cloud when opening the food processor, and avoid breathing in salt dust. This step is optional but recommended because extra fine salt is gentler on the skin.
- Melt your soap base and shea butter in a small microwave saucepan. To make this faster, you can shred or cube the soap bar.
- Mix in your food coloring if using, and stir well.
- Pour the mixture into your molds. Melt and pour salt soap will harden almost immediately, so work quickly.
- Place the mold into the fridge to harden for about 20 to 30 minutes.
- Once the soap bar feels cool, release it from the mold.
I’m wondering when you add the salt to the soap? Is it stirred right in or put in mold on its own? I also like your mold but I don’t see where that is from or how many ounces each of the 6 soaps will be.
Super cute idea!
Thanks
Hello Jen,
It looks like I must have rushed through typing this post out and missed a step in the instructions! Thank you so much for pointing it out to me so that I can go back and fix that in the post. I’m putting that on my to-do list today! Once the melt and pour soap base has been melted, this is when you’ll add your essential oils. Stir those in. Then you’ll add the mica powder and the salt next. Then pour into the molds. These soaps should be be approximately 3 ounces each. And I couldn’t find the exact mold that I used for these soaps for sale any more, but here is one that is similar in style.
Unclear – it appears this recipe is missing some steps such as when to add the salt and oils to the soap mixture