
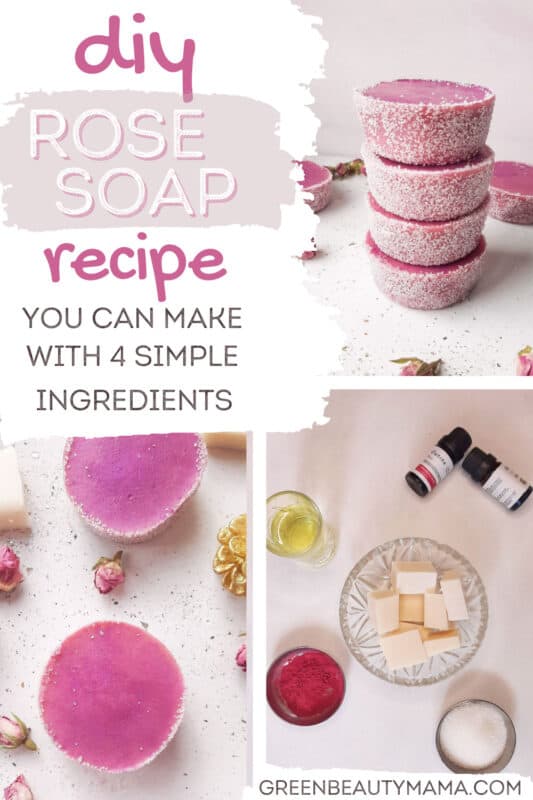
Easy Rose Soap Recipe
Learn how to make lovely rose melt and pour soap in simple steps. The natural rose soap recipe uses a natural color, essential oils, and rosehip seed oil. This easy melt-and-pour soap is fragranced with luxurious rose essential oil and colored with rose clay or pink mica.
Over the years, I have shared countless rose-inspired beauty products, from face toner, bath salts, body lotion and body butter. Or my newest obsession: DIY Rose soap.

DIY Rose Soap Recipe
This beginner rose soap recipe is perfect for anyone who enjoys the scent of roses.
You are going to love this natural soap recipe!
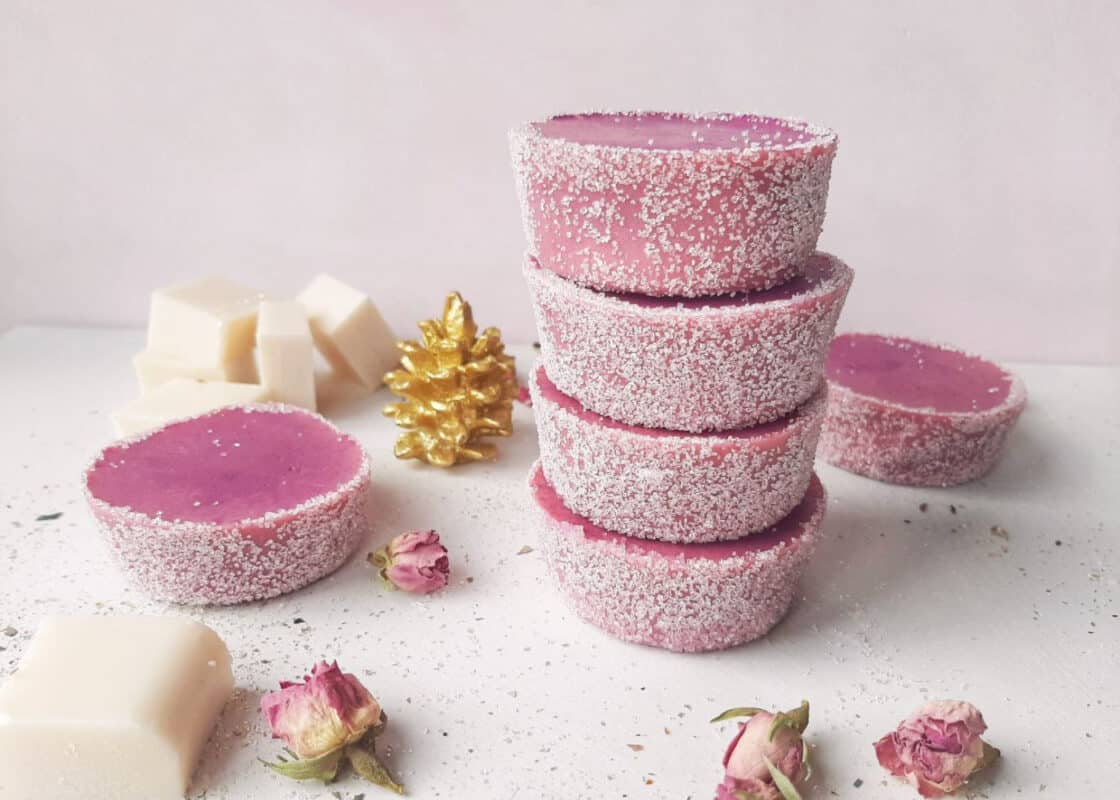
Frosting the soap with an icy sugar ring is a trick that will make even the most beginner soap maker seem like a total pro. It looks magical and is really so easy to achieve!
The rosehip seed oil has fantastic skin-regenerating and healing properties. Rose kaolin contributes a natural pink color, but you can use half as much for a paler shade of pink or leave it out completely for a creamy white bar.
Looking for more homemade skincare recipes? Try my rose body butter, rose sugar scrub, or rose bath salts!
Rose Soap Benefits
Rose is a popular ingredient in skincare and has many benefits for your skin. Rose essential oil is said to be the queen of all essential oils. The rose flower has become a symbol of purity, love, and longevity.
Rose essential oil can be a great addition to your beautifying ritual for a glowing and fresh look. Use it well diluted topically to cope with redness and puffiness.
With its ability to restore, heal and protect the epidermis, rose oil can improve the texture of your skin and reduce fine lines. Get that youthful look that you deserve.
Using rose oil can improve your condition if you have dry, sensitive, or dull skin type.
Rose Soap Ingredients
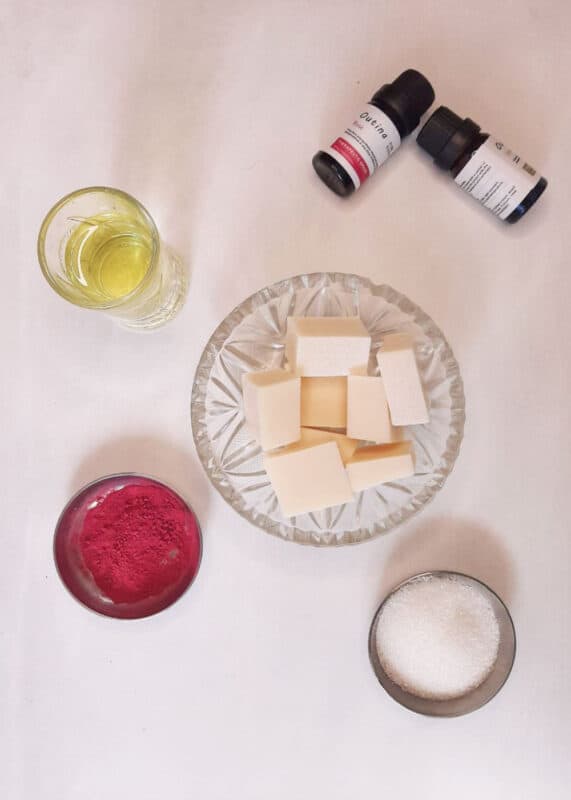
Soap base: This DIY rose soap recipe has a premade soap base, like every melt-and-pour recipe. I opted for a goat milk base. Melt-and-pour soap base is also an incredibly easy way to make rose soap because it doesn’t require the hassle of handling lye.
Rose Essential oil: is a nutrient-dense oil, high in nourishing, soothing, and replenishing components your skin can benefit from.
Pink mica/Pink Clay: gives the soap bars a festive shimmer and gorgeous cranberry color. You can make rose soap with rose clay (pink clay) or pink mica to give it a pale rose color.
Rosehip oil: provides an instant boost of moisture as it contains the highest percentage of Vitamin E and fatty acids than any other plant-derived oil. It also contains sterolins that promote skin cell metabolism and high hydration.
Granulated sugar: (white sugar) is needed to create the icy frosting.
Tools for making rose soap at home.
Aside from your ingredients, you will also need the following tools to make your homemade rose soap:
Silicone soap molds: I used two different molds for this rose soap recipe: a small rectangular mold for rose soap bars and a very small circular mold to create a tiny round soap that is intended to be used as a hand soap. Both varieties are perfect for gifts and can also be used as bridal shower favors or for other occasions.
Heat-proof glass measuring cup with spout: Pyrex measuring cups are very handy for soap making as the spout makes pouring much easier.
Wooden spoon, whisk, or silicone spatula: Mix your rose soap ingredients.
Soap knife or sharp kitchen knife: For cutting the soap base.
Spray the bottle with alcohol or rubbing alcohol: To pop the tiny bubbles that often form on the top of the soap after pouring.
Small bowl: For mixing soap colorant: your rose clay or mica with the alcohol and corn starch.
How to Make Rose Soap
- 1 lb / 450 g melt-and-pour soap base (e.g. goat’s milk or shea butter)
- 1 tsp / 5 g / 0.17 oz rosehip oil
- 2 tsp pink mica
- 25 drops of rose essential oil
- high-proof alcohol (optional)
- 1/4 cup / 50 g / 1.7 oz granulated sugar (can sub for erythritol if living in a humid environment)
- Prepare your supplies and workspace by washing everything with soap and water. You can also sanitize your work area and tools with a few spritzes of alcohol.
- Chop soap base. Chop your soap base into small cubes to speed up the melting process.
- Melt soap. Place the soap cubes into a microwave-safe container or glass measuring cup. Melt in the microwave in 30-second intervals. Stir between each burst and be careful not to burn it.
- Add oil and color. Add the argan oil and essential oils. Mix thoroughly until the oils are well incorporated. Add the rose clay or pink mica mixture slowly. Stir gently.
- Pour soap bars. Place the soap mold on a cutting board or small tray, making lifting the mold easier. Next, spray the mold with a bit of alcohol. This helps the soap adhere better to the mold. Pour the liquid soap into the mold. Spritz the with alcohol to dissolve any bubbles.
- Solidify. Leave the soap to set. It will take approximately 1 hour at room temperature or 30 minutes in the fridge.
- Unmold. Once solidified, release the soap by gently pulling back the mold to break the airlock. Then pop each piece out of the mold.
- Frost. Once fully hardened, remove the soap bars from the mold. Using a soft, flat brush, moisten the edges of the soap with a small amount of water. You want the rim barely moist, not dripping wet. Place the sugar in a shallow bowl. Then roll the moistened edges of the soap in the sugar to coat. Let dry for a couple of minutes. Now you can enjoy your wonderful frosted rose soap!
- Package and store. Wrap your cinnamon soap bars tightly in plastic wrap to protect them from moisture. Enjoy!

How to prevent glycerin dew in rose soap
When you first look at a soap that has been sweating, it almost looks like a layer of frost is on it. But, when you pick it up, you notice it is wet. There are little droplets of water on it.
Melt and Pour soap base contains glycerin, an organic compound known as glycerol. It’s a clear, odourless liquid derived from animal fat and vegetable oil at room temperature. It’s also a natural byproduct of the saponification process.
But to combat the formation of glycerin dew, thoroughly dry your soaps before tightly wrapping them in plastic wrap.
The cool thing about using shrink wrap it the soap looks professionally wrapped at the end. Put the shrink wrap around your soap and lightly heat it with a heat gun.
While melt-and-pour soap doesn’t necessitate the long curing times associated with traditional soap making, we still opt to let our melt-and-pour soap dry for approximately 2-3 days before wrapping them.

DIY Rose Soap Recipe
Materials
- 1 lb / 450 g melt-and-pour soap base (e.g. goat’s milk or shea butter)
- 1 tsp / 5 g / 0.17 oz rosehip oil
- 2 tsp red mica
- 10 drops of rose essential oil
- high-proof alcohol (optional)
- 1/4 cup / 50 g / 1.7 oz granulated sugar (can sub for erythritol if living in a humid environment)
Tools
- Silicone Soap Molds
- Heat-proof glass measuring cup
- Wooden spoon, whisk, or silicone spatula
- Cutting board
- Soap knife
Instructions
- Prepare your supplies and workspace by washing everything with soap and water. You can also sanitize your work area and tools with a few spritzes of alcohol.
- Chop soap base. Chop your soap base into small cubes to speed up the melting process.
- Melt soap. Place the soap cubes into a microwave-safe container or glass measuring cup. Melt in the microwave in 30-second intervals. Stir between each burst and be careful not to burn it.
- Add oil and color. Add the argan oil and essential oils. Mix thoroughly until the oils are well incorporated. Add the rose clay or pink mica mixture slowly. Stir gently.
- Pour soap bars. Place the soap mold on a cutting board or small tray, making lifting the mold easier. Next, spray the mold with a bit of alcohol. This helps the soap adhere better to the mold. Pour the liquid soap into the mold. Spritz the with alcohol to dissolve any bubbles.
- Solidify. Leave the soap to set. It will take approximately 1 hour at room temperature or 30 minutes in the fridge.
- Unmold. Once solidified, release the soap by gently pulling back the mold to break the airlock. Then pop each piece out of the mold.
- Frost. Once fully hardened, remove the soap bars from the mold. Using a soft, flat brush, moisten the edges of the soap with a small amount of water. You want the rim barely moist, not dripping wet. Place the sugar in a shallow bowl. Then roll the moistened edges of the soap in the sugar to coat. Let dry for a couple of minutes. Now you can enjoy your wonderful frosted rose soap!
- Package and store. Wrap your cinnamon soap bars tightly in plastic wrap to protect them from moisture. Enjoy!