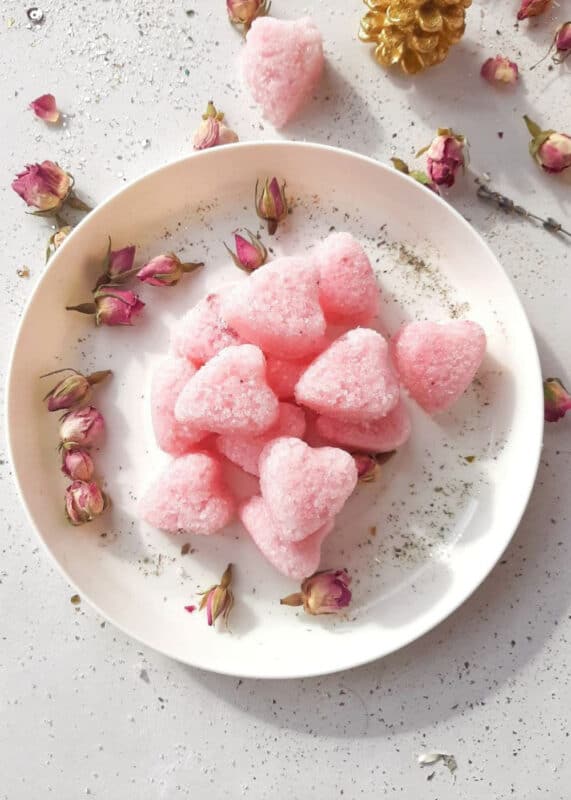
Heart-Shaped DIY Scrub Bars for Valentine’s Day
With Valentine’s Day just a couple of weeks away, I thought to share these heart-shaped sugar scrub bars with you.
These easy DIY scrub bars exfoliate and moisturize all at once. It’s simple to make yourself with just a few simple ingredients that you likely have on hand already.
It takes about two minutes to make these sugar scrub bars and is much less expensive than store-bought sugar scrubs.
Sugar scrubs are a wonderful way to exfoliate your skin, but they can get rather messy! That’s why I’ve started making my own sugar scrub bars.
I love keeping a jar next to my sink to exfoliate my skin, especially in winter when my hands can get so dry.
I’ve had these heart-shaped molds in my freezer forever, but I just recently thought of using them for creating soaps and sugar scrubs. I love it when I get inspired and find different uses for simple objects around the house.
I picked up shea butter & coconut oil to moisturize the skin, sugar to do the scrubbing, a soap base to hold the ingredients together, pink coloring for extra cuteness, and essential oils for a yummy scent.

How to Make DIY Scrub Bars
With high-quality essential oils, you can create amazing smelling sugar scrub bars that provide you with some great benefits. Today I want to share with you how to make these fun DIY heart-shaped scrub bars.
To make some, you’ll need the following ingredients:
- Granulated Sugar
- Soap Base
- Colorant
- Coconut oil
- Shea Butter
- Essential Oils
Directions:
- Melt your soap base and shea butter using a microwave, a double boiler, or a pan and a bowl (any method should be fine, as long as the ingredients are nicely melted).
- Pour the coconut oil, shea butter, and shredded soap into a clean bowl and microwave on high for 15-second intervals, stirring in between until the ingredients melt together. You can use a double boiler for this step.
- Add 1 cup of the mixture to a medium bowl.
- Add your coloring and a few drops of your high-quality essential oil. Mix together.
- Pour the sugar and stir quickly; once you add the sugar, the mixture will harden instantly.
- If it thickens, put it back in the microwave for 5-10 seconds.
- Pour into your mold and let sit for about 2 hours.
- Pop bars out of the mold and store them in an airtight container.
- Should last up to 3 months if stored properly.

How to Use Scrub Bars
You can use these DIY scrub bars in the bath and shower. First, wet and soften your skin with warm water and then rub the scrub bar over your body. Massage your skin using circular motions and gentle pressure. Then shower off any excess product.
More DIY Body Scrub Recipe

Heart-Shaped DIY Scrub Bars for Valentine’s Day
Ingredients
- 70 g 2.5 oz unscented soap bar or soap base
- 114 g 4 oz shea butter
- 450 g 16 oz white refined sugar
- 2 Tbsp coconut oil
- 1/2 Tbsp essential oils of your choice
- pinch of pink mica powder
Instructions
- Melt your soap base and shea butter using a microwave, a double boiler, or a pan and a bowl (any method should be fine, as long as the ingredients are nicely melted).
- Pour the coconut oil, shea butter, and shredded soap base into a clean bowl and microwave on high for 15-second intervals, stirring in between until the ingredients melt together. You can use a double boiler for this step.
- Add 1 cup of the mixture to a medium bowl.
- Add your coloring and a few drops of your high-quality essential oil. Mix together.
- Pour the sugar and make sure to stir quickly because once you add the sugar the mixture will harden instantly.
- If it is starting to thicken, put it back in the microwave for 5-10 seconds.
- Pour into your mold and let sit for about 2 hours.
- Pop bars out of the mold and store them in an airtight container.
What Essential Oils are Best for Skin
Adding essential oils to your DIY scrub bars provides not only natural health benefits but also smells great!
Peppermint oil – energizing with a lovely cooling sensation, this is my go-to oil when I am making foot scrubs or attending to sore muscles.
Lavender oil – has numerous skincare uses. Adding this oil to your sugar scrub can be beneficial for several skin issues.
Geranium oil – said to reduce wrinkles and slow premature aging, geranium also has a lovely floral scent.
Rose oil – has antibacterial qualities that effectively fight the bacteria responsible for acne. Its anti-inflammatory properties and antioxidant content make rose an excellent anti-aging essential oil.
Citrus oils – any citrus oil like lemon, orange, grapefruit, lime, and bergamot – Great for uplifting mood.
Let’s connect!
These are SO fun and cute! Do you have product recommendations?! Thanks girl!